Why 72 vs 300 DPI Matters: Expert Guide to Perfect Print Quality
Printing requires 300 DPI for crisp, clear results, while computer monitors only display at just 72 DPI or 96 DPI, creating a significant gap between what looks good on screen and what prints beautifully on paper.
DPI stands for “dots per inch.” It tells us how many tiny dots of ink a printer uses in one inch of your printed material. Each dot helps build the final image. For high-quality printing, you should always use 300 dots per each inch, when printed it will have 300 tiny print dots across and 300 dots down, making a total of 90,000 dots in just one square inch. If your printing is below 200 DPI, it may look blurry or pixelated, which can hurt your professional image.
Master the critical difference between screen resolution and print requirements. Learn precise techniques for preparing images that deliver professional results every time. Discover essential best practices that ensure your printed materials reflect the quality and attention to detail your business deserves.
Understanding DPI and Print Quality Impact

DPI measures how many individual ink dots a printer places within each linear inch of paper. This fundamental concept determines how sharp and professional your printed materials appear, from business cards to brochures.
Print resolution creates visual impact
DPI represents the density of ink dots that form your images and text on paper. These dots function as building blocks for your final print. Higher dot density produces clearer, more detailed prints that maintain professional appearance at close viewing distances.
Physical prints require sufficient dot density to create smooth, continuous images rather than visible individual dots. Print materials reflect light differently than digital screens, demanding higher resolution for optimal results. Proper dot density ensures crisp text reproduction and accurate color representation across your marketing materials.
300 DPI delivers professional standards
Professional printing uses 300 dots per inch, creating 90,000 dots per square inch. Web images typically use 72 DPI, yielding only 5,184 dots per square inch, insufficient for quality printing.
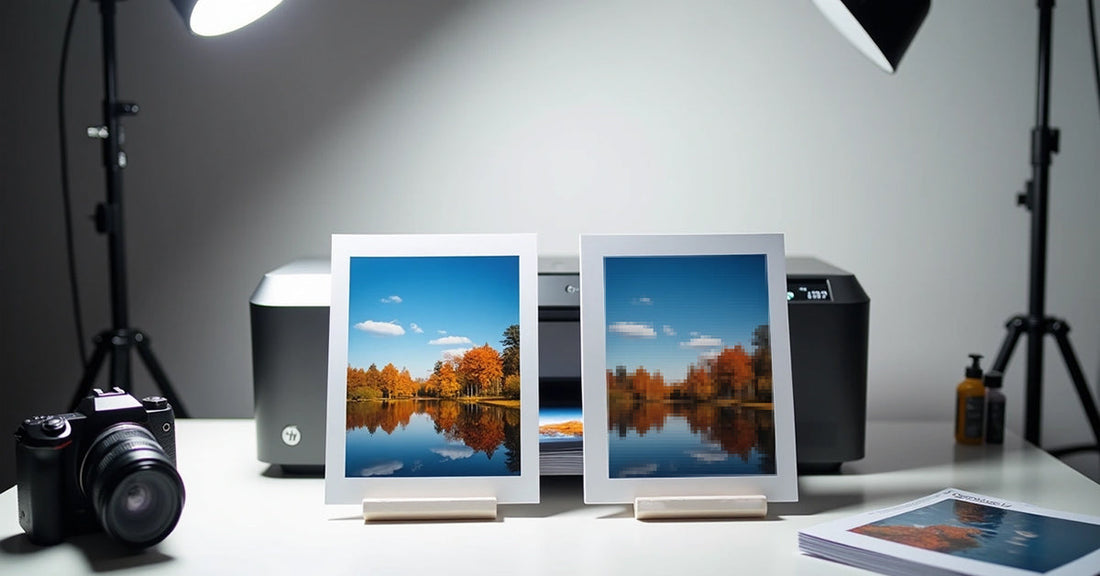
A 300 DPI image contains approximately 17 times more information than its 72 DPI counterpart. Web images appear sharp on screens but become blurry, pixelated, or jagged when printed. Screens emit light directly to your eyes, while printed materials must reflect available light to display images clearly.
Professional print quality requires proper DPI
Print resolution affects every aspect of your finished materials. Proper DPI settings ensure:
- Text clarity: Small fonts remain readable and crisp at 300+ DPI
- Color accuracy: More dots create smoother color transitions and better reproduction
- Professional appearance: Marketing materials at proper resolution convey quality and attention to detail
Business cards, brochures, and product packaging demand higher DPI because customers examine them at close range. Materials containing photographs or intricate graphics particularly benefit from proper resolution settings.
Commercial printing requires 300 DPI at final print size for professional results. This standard approximates the limit of what the human eye distinguishes at normal reading distance. Always prepare your files at 300 DPI to ensure your printed materials reflect the quality your business deserves.
Prepare Your Images for Professional Print Results
Perfect print quality starts with proper image preparation. Choose the right resolution settings to ensure professional results rather than disappointing output.
Select Optimal DPI for Your Project Type
Professional printing projects require 300 DPI for the ideal balance between quality and file size. This resolution produces smooth, high-quality images where individual dots remain invisible to the human eye.
Fine art reproductions, archival prints, and materials with micro-text benefit from 600 DPI. Large-format posters viewed from distance function well at 100 DPI minimum.
Consider viewing distance when selecting resolution. Business cards and brochures examined up close demand higher resolution than banners or posters viewed from afar.
Check Your Image DPI Settings
Windows Users:
- Right-click your image file and select "Properties"
- Click the "Details" tab
- Find the resolution listed under the "Image" section
Mac Users:
- Open your image in Preview
- Go to Tools > Show Inspector
- Select either "General Info" (first tab) or "More Info" (second tab)
- Locate the resolution information
Adjust DPI in Professional Software
Photoshop Method:
- Open your image
- Navigate to Image > Image Size
- Locate the "Resolution" field
- Enter 300 for the desired DPI value
- Uncheck "Resample" if you want to maintain original pixel dimensions
Illustrator Method:
- Access Effect > Document Raster Effect Settings
- Change resolution to High (300 ppi)
- Click OK
Alternative Illustrator Export:
- Choose File > Export As
- Select your desired format
- Check "Use Artboards" to maintain dimensions
- Click Export and set the PPI to 300
Always start with high-resolution source files. Simply increasing DPI on low-resolution images won't enhance quality, professional results require proper source material from the beginning.
Common DPI Mistakes That Ruin Print Quality
Poor resolution choices destroy professional print projects. Avoid these critical errors that waste time, money, and damage your business reputation.
Upsampling Creates Blurry, Unprofessional Results
Artificially increasing image resolution seems like an easy fix for low-quality files. Simply changing the DPI number in editing software doesn't add detail to your image. This process enlarges existing pixels without creating new information, resulting in bigger, blurrier pixels. Software cannot invent detail that wasn't originally captured.
Start with high-resolution source files. Quality begins with proper resolution from the beginning, not software manipulation afterward.
Web Images Fail Miserably When Printed
Web graphics operate at 72 DPI while professional printing requires 300 DPI. This fundamental mismatch creates multiple problems:
- Web images use RGB color format instead of CMYK needed for printing
- Web images cannot be enlarged without significant quality loss
- Web images appear blurry and pixelated when printed
Downloading images from websites for print projects almost always produces poor results. Online images may appear crisp on screen but become noticeably pixelated when transferred to paper.
Text Becomes Unreadable at Low Resolution
Text clarity suffers dramatically at insufficient DPI. Jagged edges and unreadable small fonts destroy the professional appearance of business documents, marketing materials, and anything containing fine print.
Different content types demand different DPI standards. Text and line art require higher resolution than photographs to maintain crisp edges and readability. Small text elements need at least 300 DPI to ensure clear reproduction.
Business cards, letterheads, and brochures particularly suffer when text resolution falls below professional standards. Always verify text clarity at 300 DPI before sending files to print.
Professional Print Standards That Deliver Quality Results
Quality printing demands precise file preparation. Follow these essential standards to achieve professional results that reflect your business excellence.
Prepare Files at Final Print Dimensions
Create your images at exactly 300 DPI using the final print size. This approach delivers optimal image clarity while maintaining manageable file sizes. Enlarging a 300 DPI image after creation reduces its effective resolution, causing quality degradation that undermines professional appearance.
Choose Scanning Resolution Based on Content Type
Photographs require 300 DPI scanning for sharp, professional reproduction. Text-heavy documents benefit from 400 DPI to capture fine details and ensure readability. Plan ahead, if you intend to enlarge scanned materials, increase your scanning resolution by the same percentage as your planned enlargement.
Select File Formats That Preserve Quality
TIF and EPS formats maintain image integrity through multiple uses, preserving both color accuracy and sharpness. These lossless formats prevent the quality degradation common with JPEG or GIF compression. When saving TIFF files, apply LZW compression to reduce file size without sacrificing image quality.
Ensure Accurate Color Reproduction
Commercial presses operate using CMYK color space, different from RGB displays on your computer screen. Prepare your files properly:
- Convert all RGB images to CMYK before submission
- Expect colors to appear slightly muted after conversion
- Print test samples before committing to large runs
- Request your printer's specific CMYK color profiles for precise results
Professional printing requires attention to technical details that directly impact your final product quality. These standards ensure your printed materials meet the high expectations your business deserves.
Professional Print Quality Starts With Proper DPI
Master these resolution principles to ensure your printed materials make a strong professional impression every time. 300 DPI at final print size delivers the quality your business deserves, while 72 DPI web images fall short of professional standards.
High-resolution source files remain essential for quality results. Avoid the temptation to artificially increase low-resolution images—this approach creates bigger pixels, not better quality. Choose TIF or EPS formats to preserve image sharpness and color accuracy throughout the printing process.
Different materials demand different approaches. Business cards and brochures require higher resolution due to close viewing, while large banners function well at lower settings. Convert RGB images to CMYK before submission to prevent unexpected color shifts during commercial printing.
Check your DPI settings before sending files to print, this simple step separates amateur results from polished, professional output. Your printed materials reflect your attention to detail and commitment to quality, making proper resolution an essential investment in your professional image.